

SUMMARY
Bitdeer SealMiner A2, built for mining the SHA-256 algorithm, delivers reliable hash performance with power consumption ranging between 3630W to 3960W based on the power mode selected. It offers multiple settings, including low power, normal, and high performance modes, making it versatile for both home and small-farm mining setups.
With a sleek, powder-coated design and surprisingly quiet operation after startup, the SealMiner A2 is ideal for serious miners seeking efficiency and stability. If you’ve just received your SealMiner A2 and are looking to get started, this setup guide walks you through the entire process step-by-step.
What’s Inside the Shipment Box?
- The Bitdeer SealMiner A2 arrives in a thick cardboard box lined with protective foam padding on the top and bottom to ensure secure delivery.

- The ASIC miner is safely enclosed in an anti-static bag to protect it from physical or electrostatic damage.
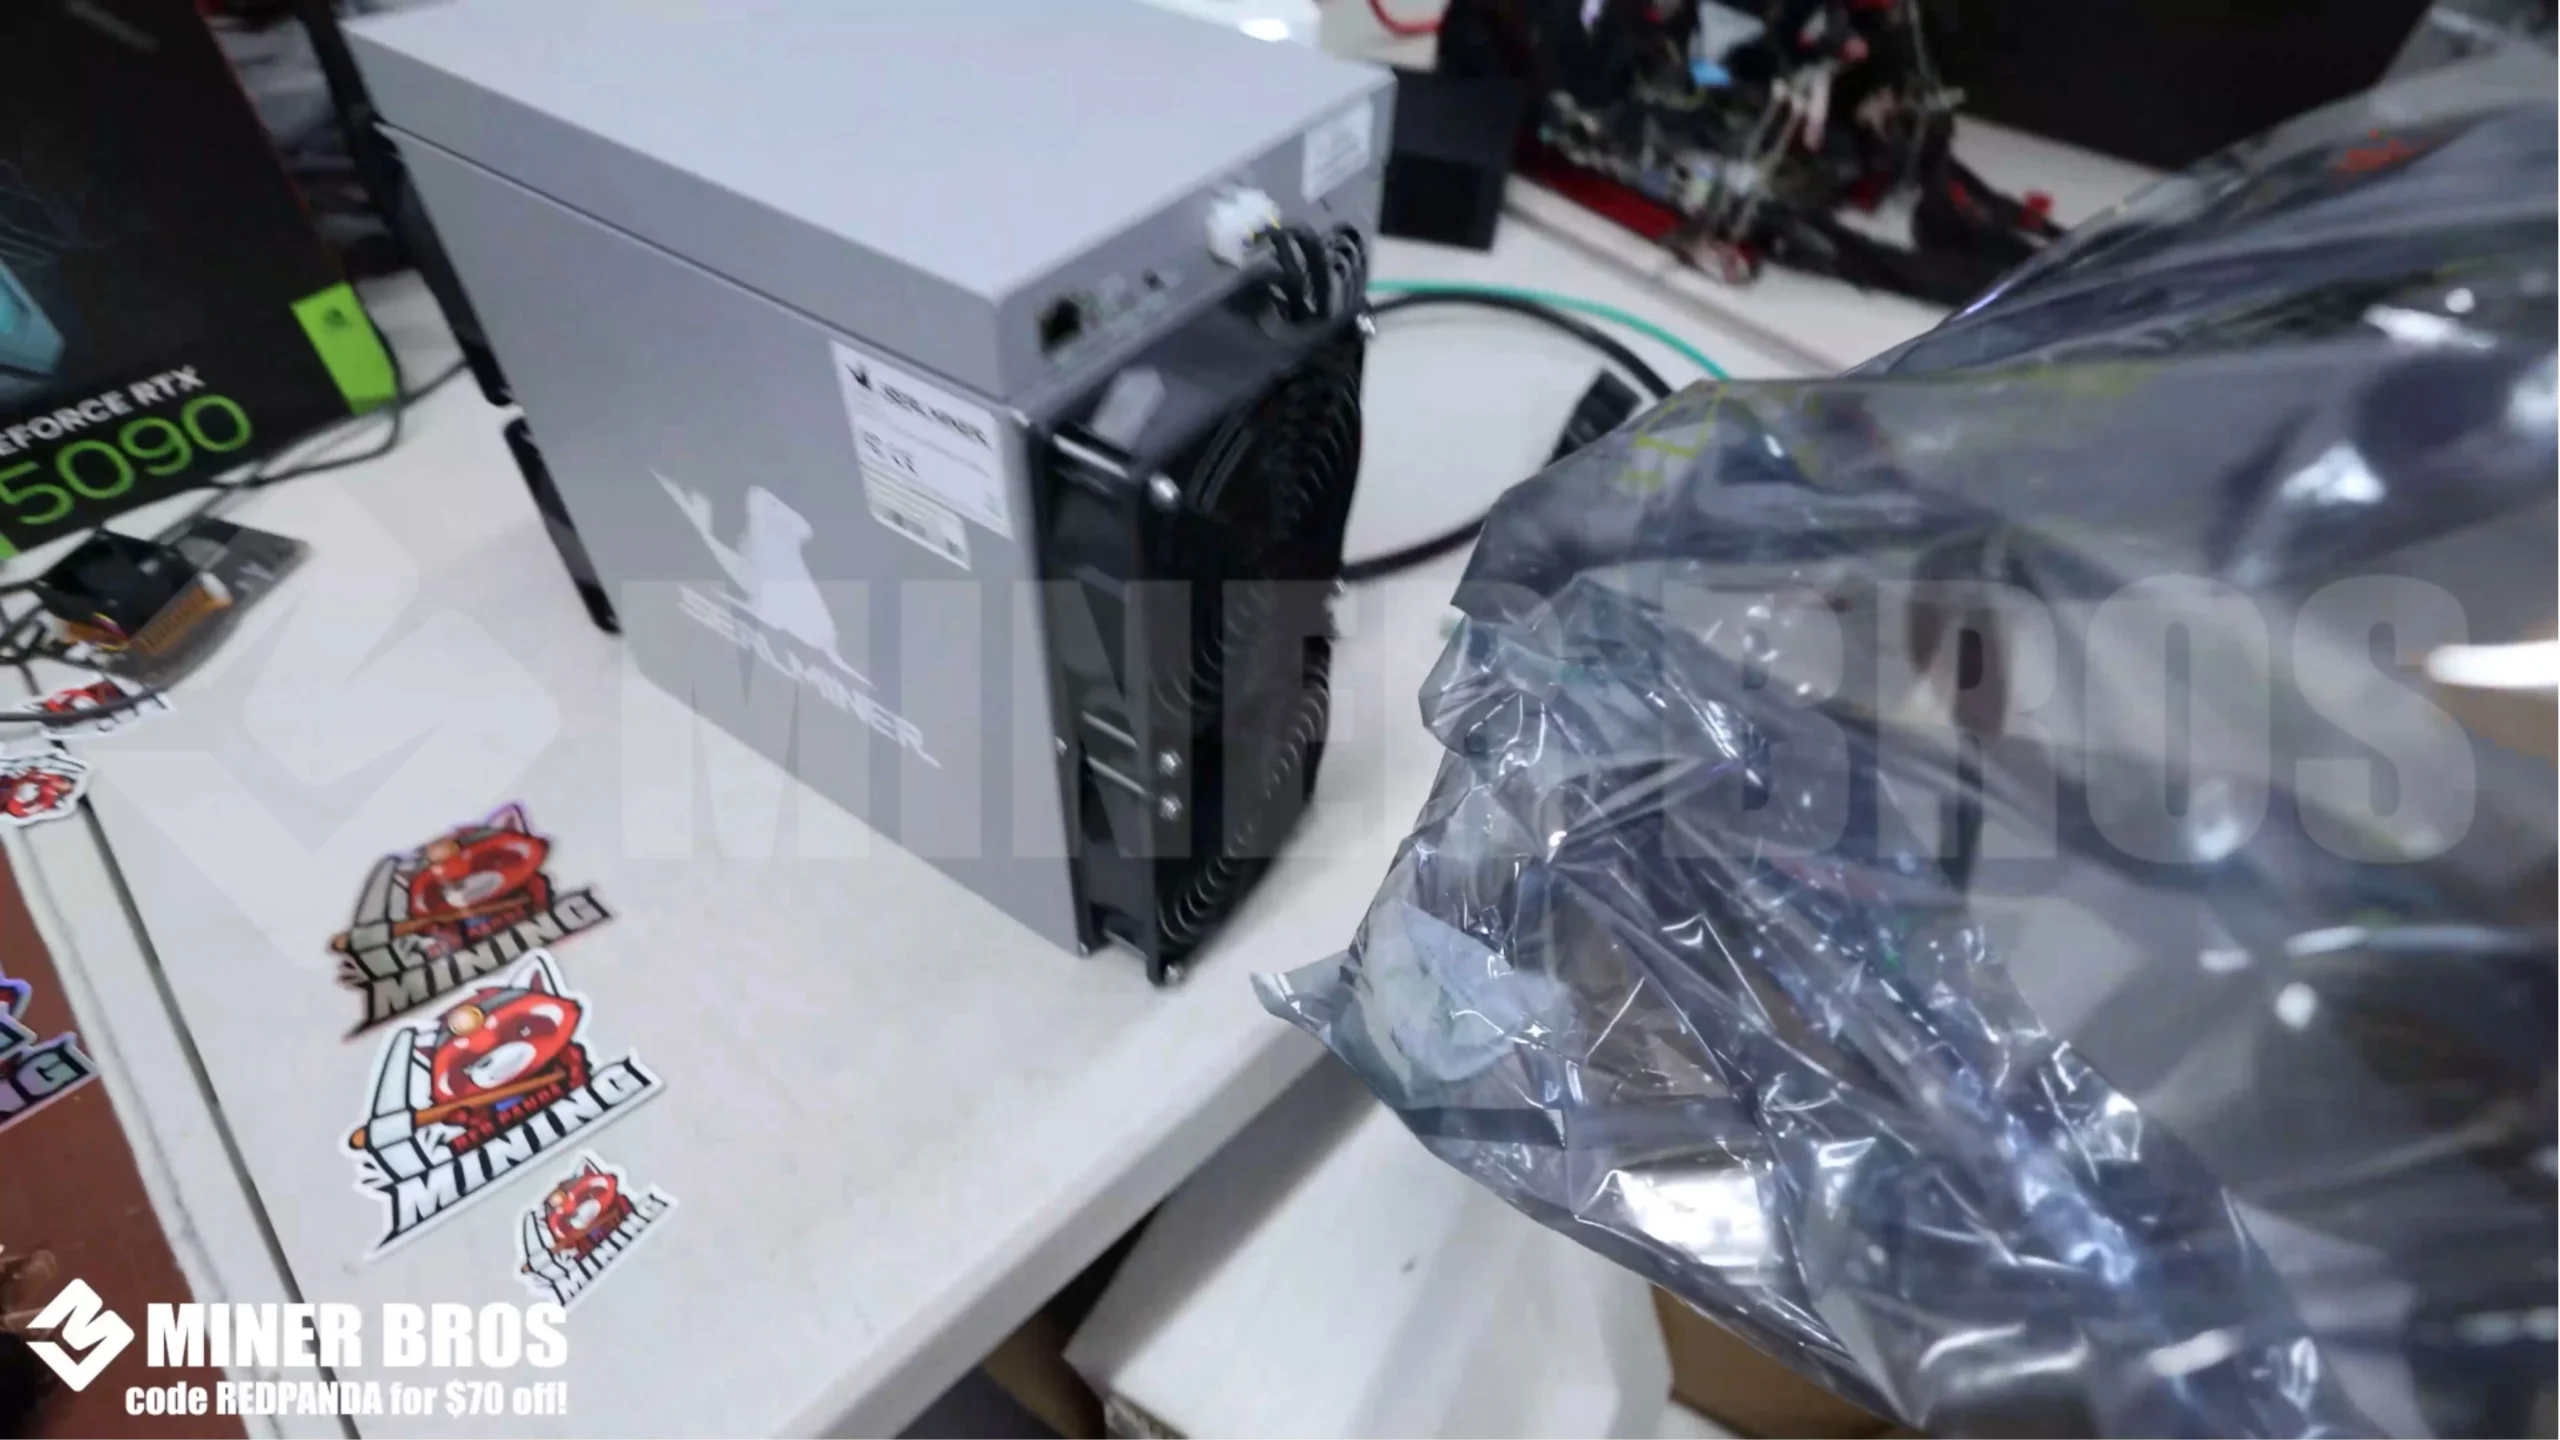
- The shipping box includes built-in carry handles, making it easy to lift and move.

- Once unpacked, place the unit on a stable, flat surface in a cool, well-ventilated space preferably with exhaust or airflow support to handle the heat output.
Step-by-Step Instructions for Setting Up the Bitdeer SealMiner A2
1. Preparing the ASIC
The SealMiner A2 pulls between 3630 and 3960W depending on the power mode used. Standard residential outlets are insufficient for this power requirement.
- You’ll need a 220V–240V / 30A electrical circuit installed, ideally by a certified electrician.
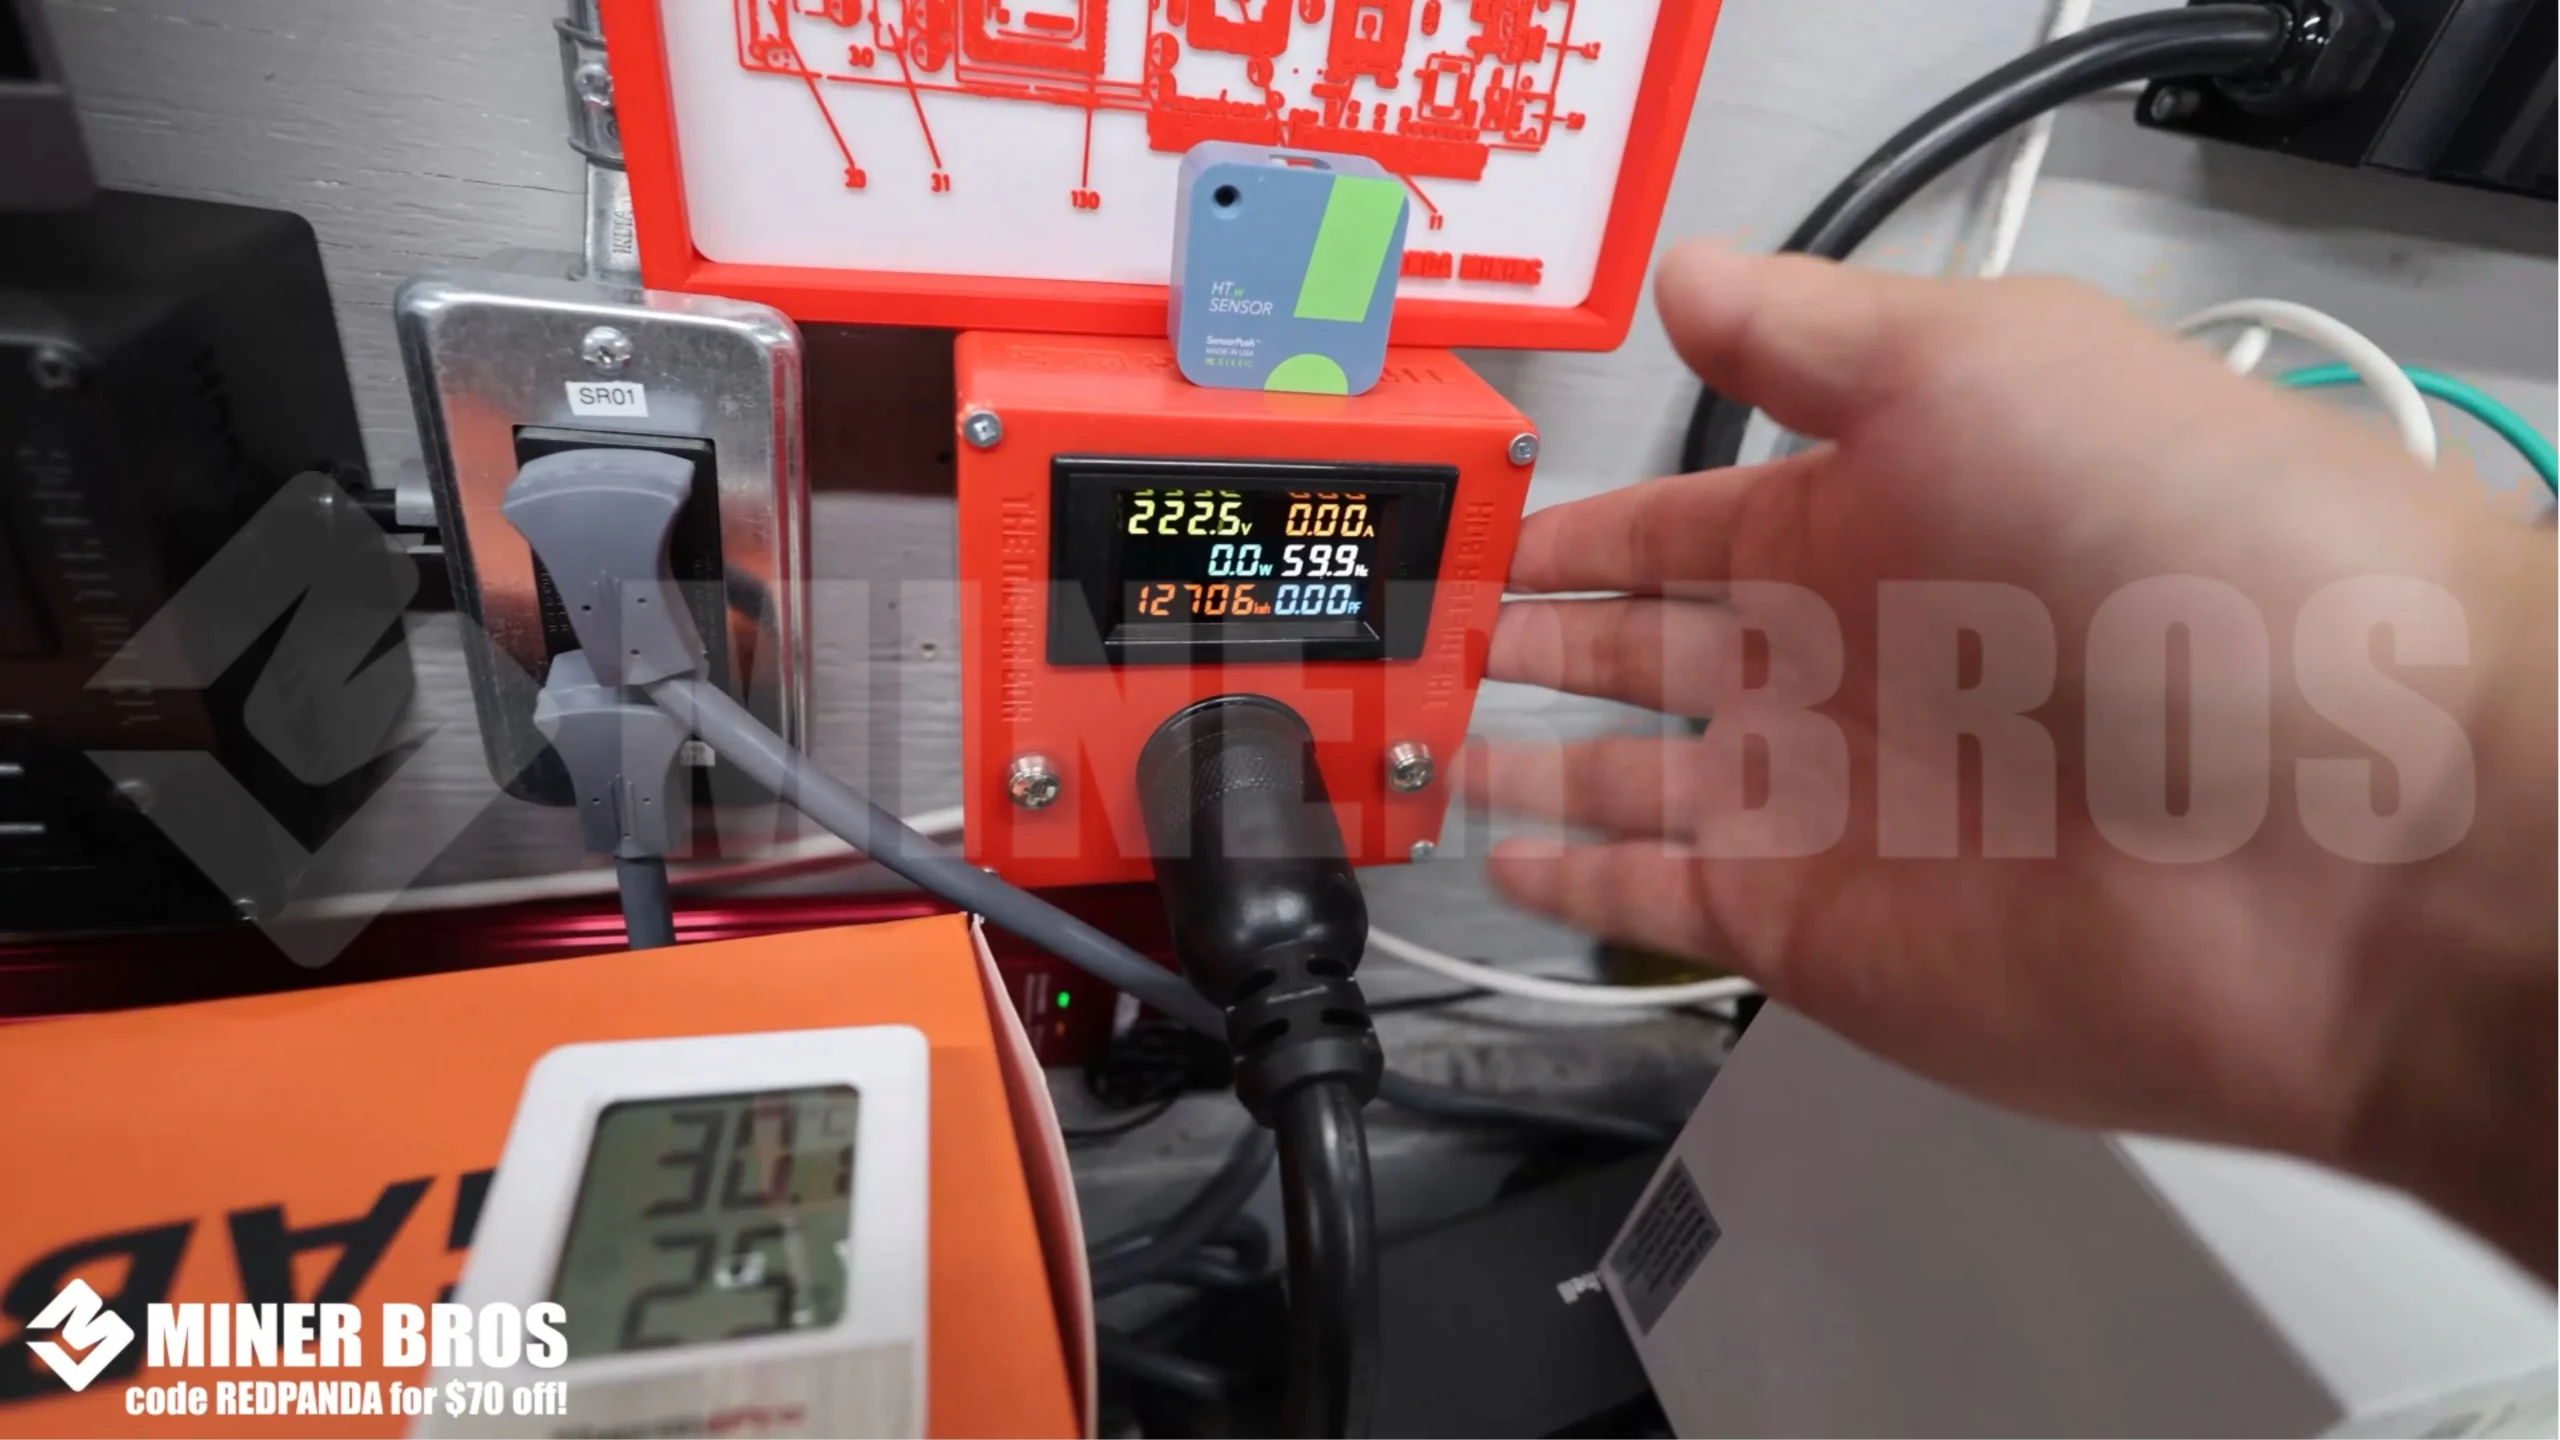
- A 240V-rated 30A PDU (Power Distribution Unit) is essential to distribute power safely and efficiently.

- The unit comes with a P13 to C20 power cable that connects the ASIC to the PDU.

- Now, insert the Ethernet cable into the miner. Wi-Fi is not supported the connection must be hardwired.

- Match the green markers on the power cable and plug it securely into the power port on the ASIC. Push until it locks into place

- Plug the other end into the PDU to power on the unit. The ASIC will automatically start. Initial startup may be loud due to the fans ramping up.

2. Configuring the ASIC
The SealMiner A2 does not display its IP on-screen. You can retrieve the IP address using one of the following methods:
- Use a free tool like Advanced IP Scanner to detect the IP address labeled under the hostname “SealMiner”.
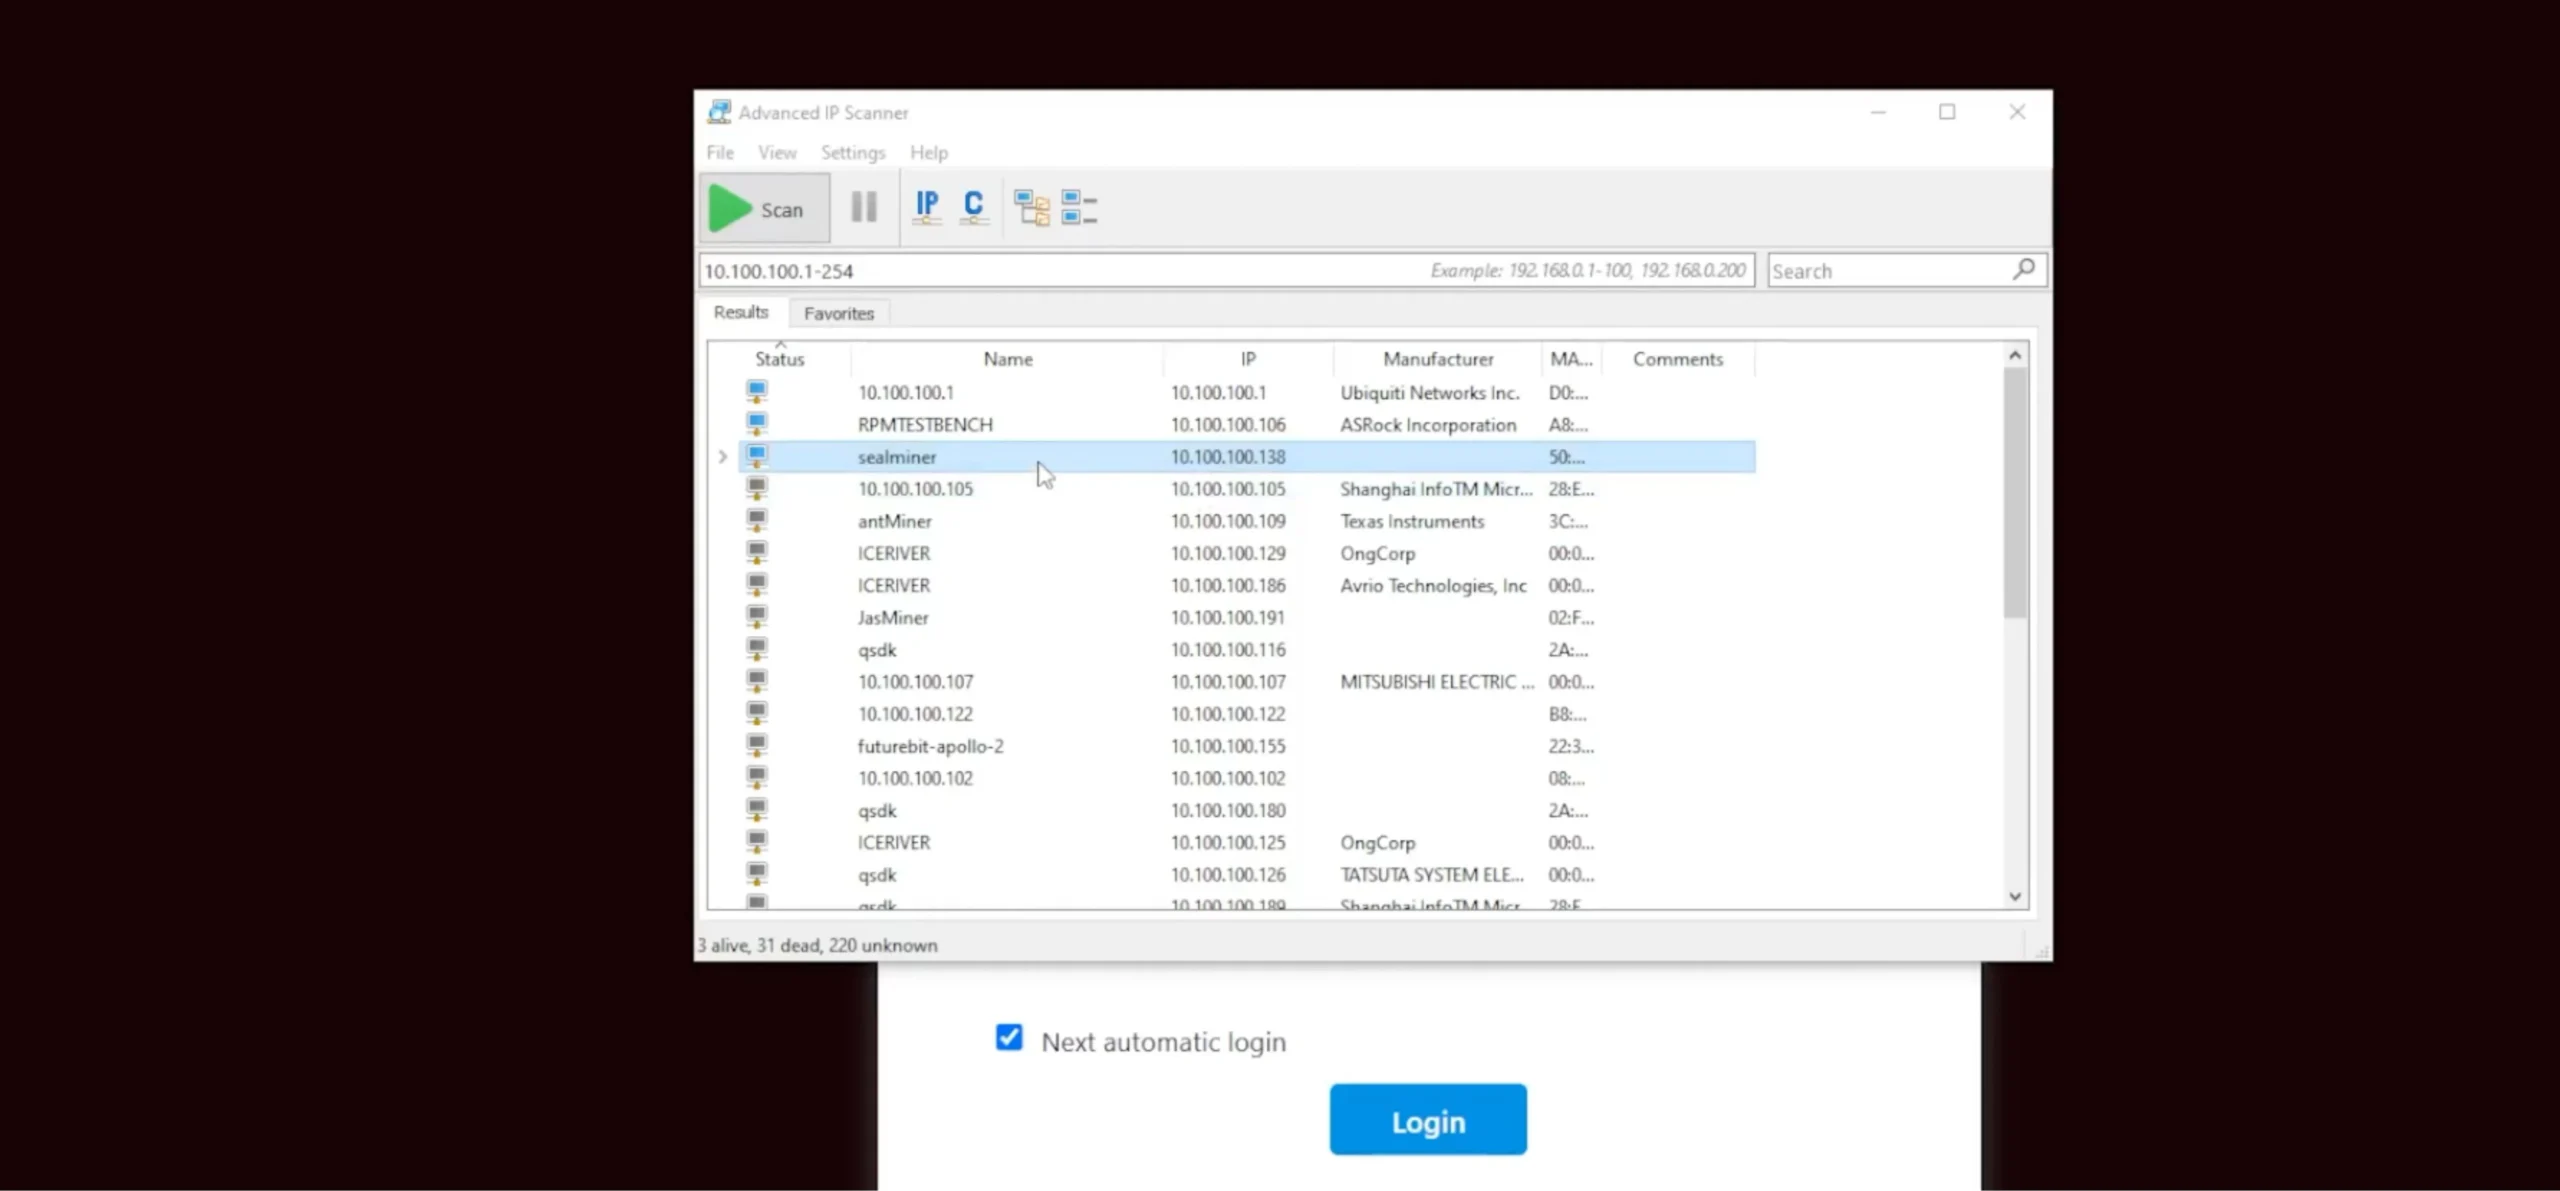
- Alternatively, access your router’s admin interface and locate the connected device labeled “SealMiner”.
- Once you have the IP, you’ll enter it into your web browser to access the GUI dashboard.
3. Accessing the Bitdeer SealMiner A2 via the Web Browser
- Open any browser and enter the noted IP address in the address bar. You’ll be directed to a login screen.
~ Default Login Credentials:
- Username: SEAL
- Password: SEAL

- After logging in, you’ll reach the SealMiner’s web interface. This dashboard displays all key metrics like hash rate, temperature, fan speeds, and power efficiency in real time.

4. Adding the Mining Pool
- You need to connect your ASIC to a mining pool to begin mining Bitcoin.
- Go to miningpoolstats.stream to browse reliable SHA-256 pools. For this example, we’ll use Mining Dutch.

- Sign up on Mining Dutch and log in.

- Navigate to Getting Started and ensure SHA-256 is selected as the algorithm.
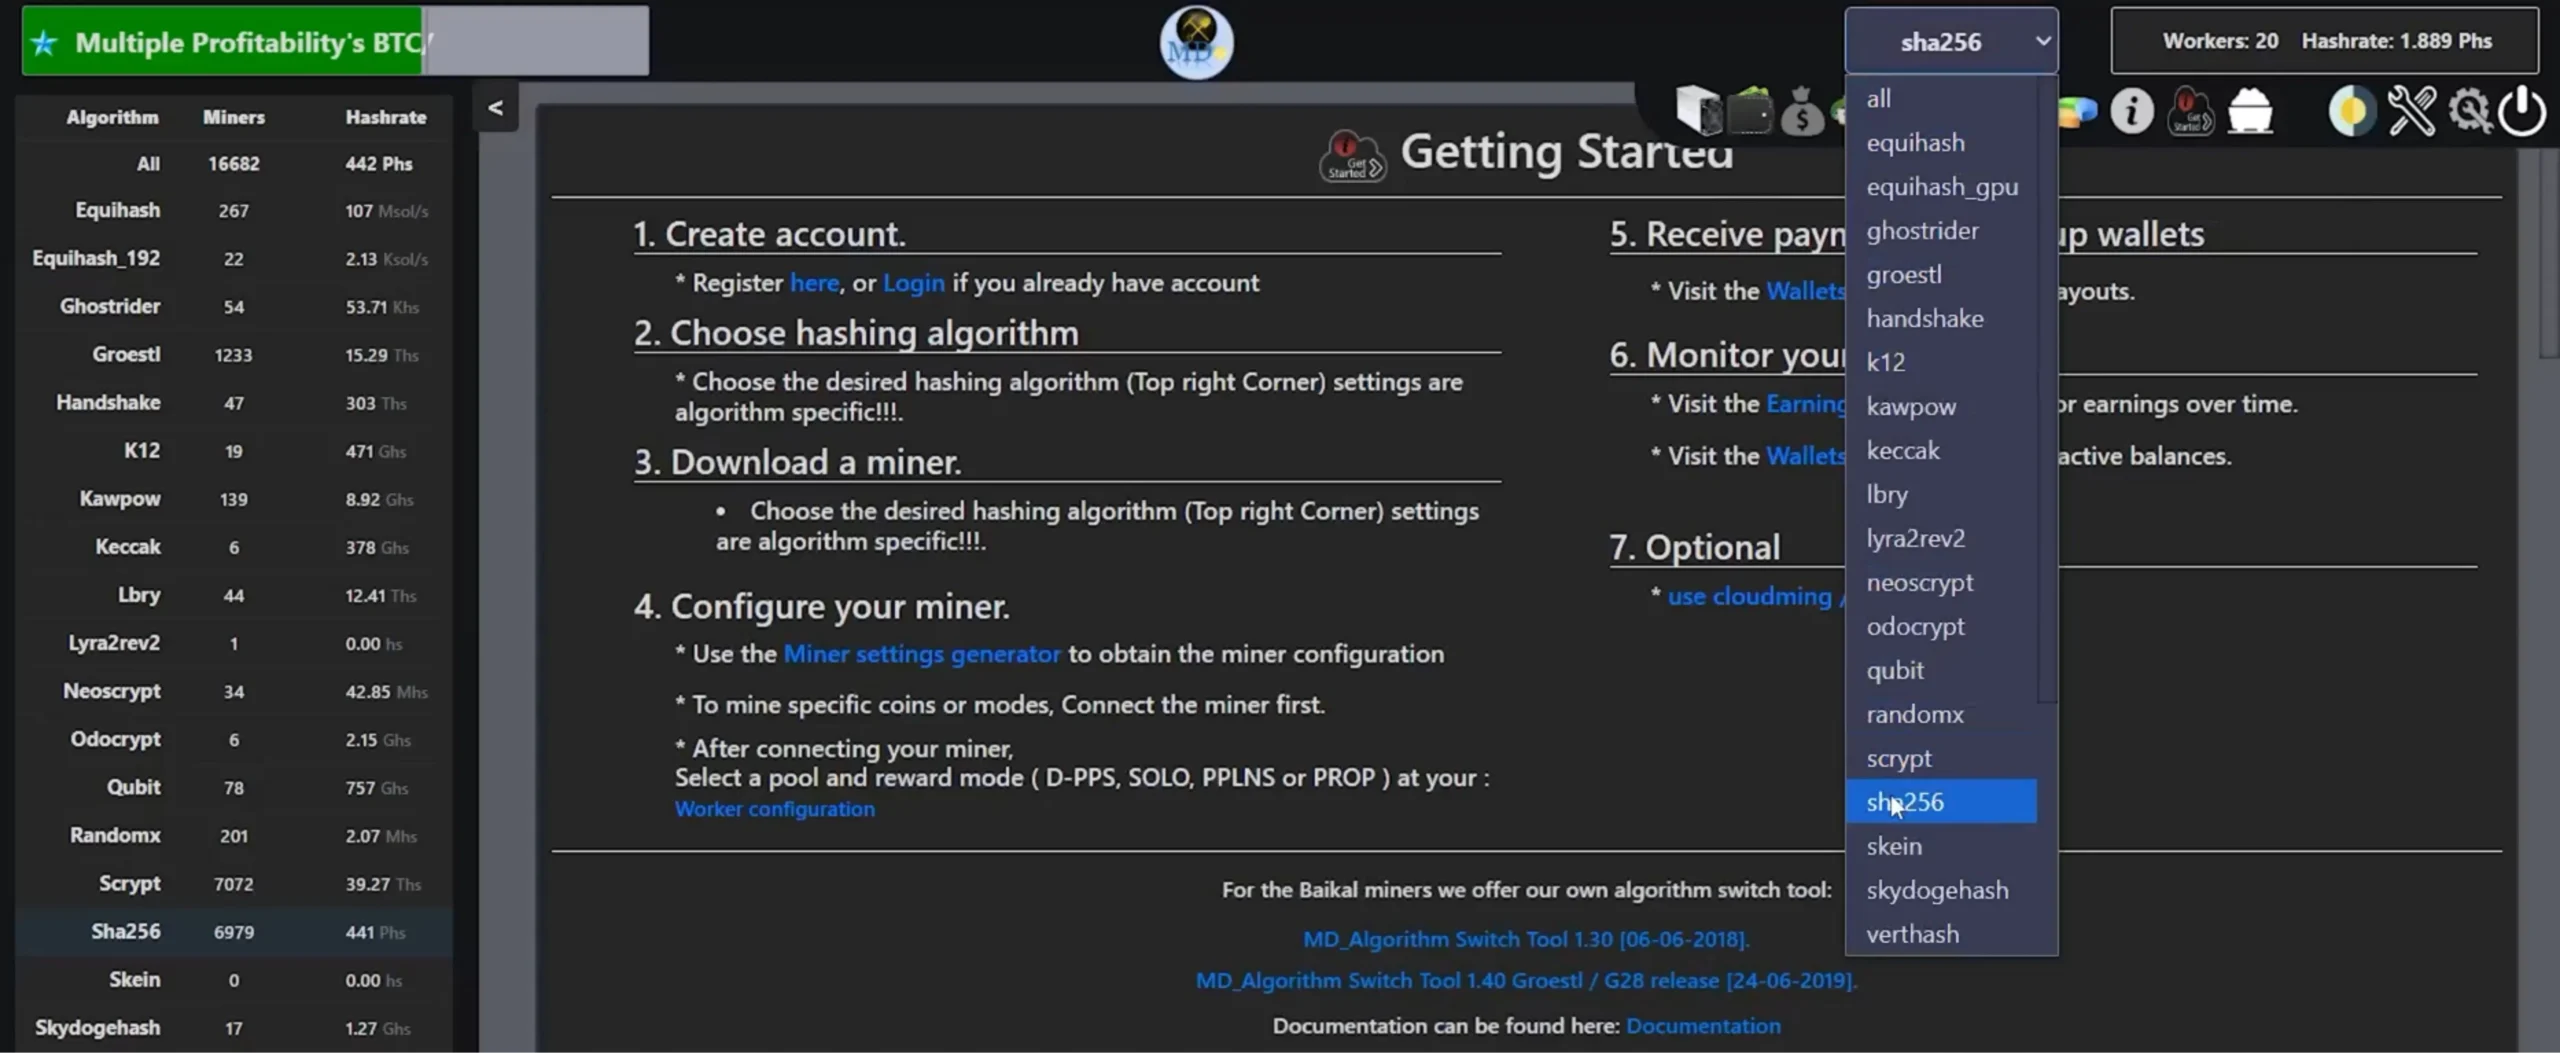
- Choose the server URL for your geographic region (e.g., stratum+tcp://ca.mining-dutch.nl:9995).

- Paste this URL into the Pool 1 field on your miner dashboard.
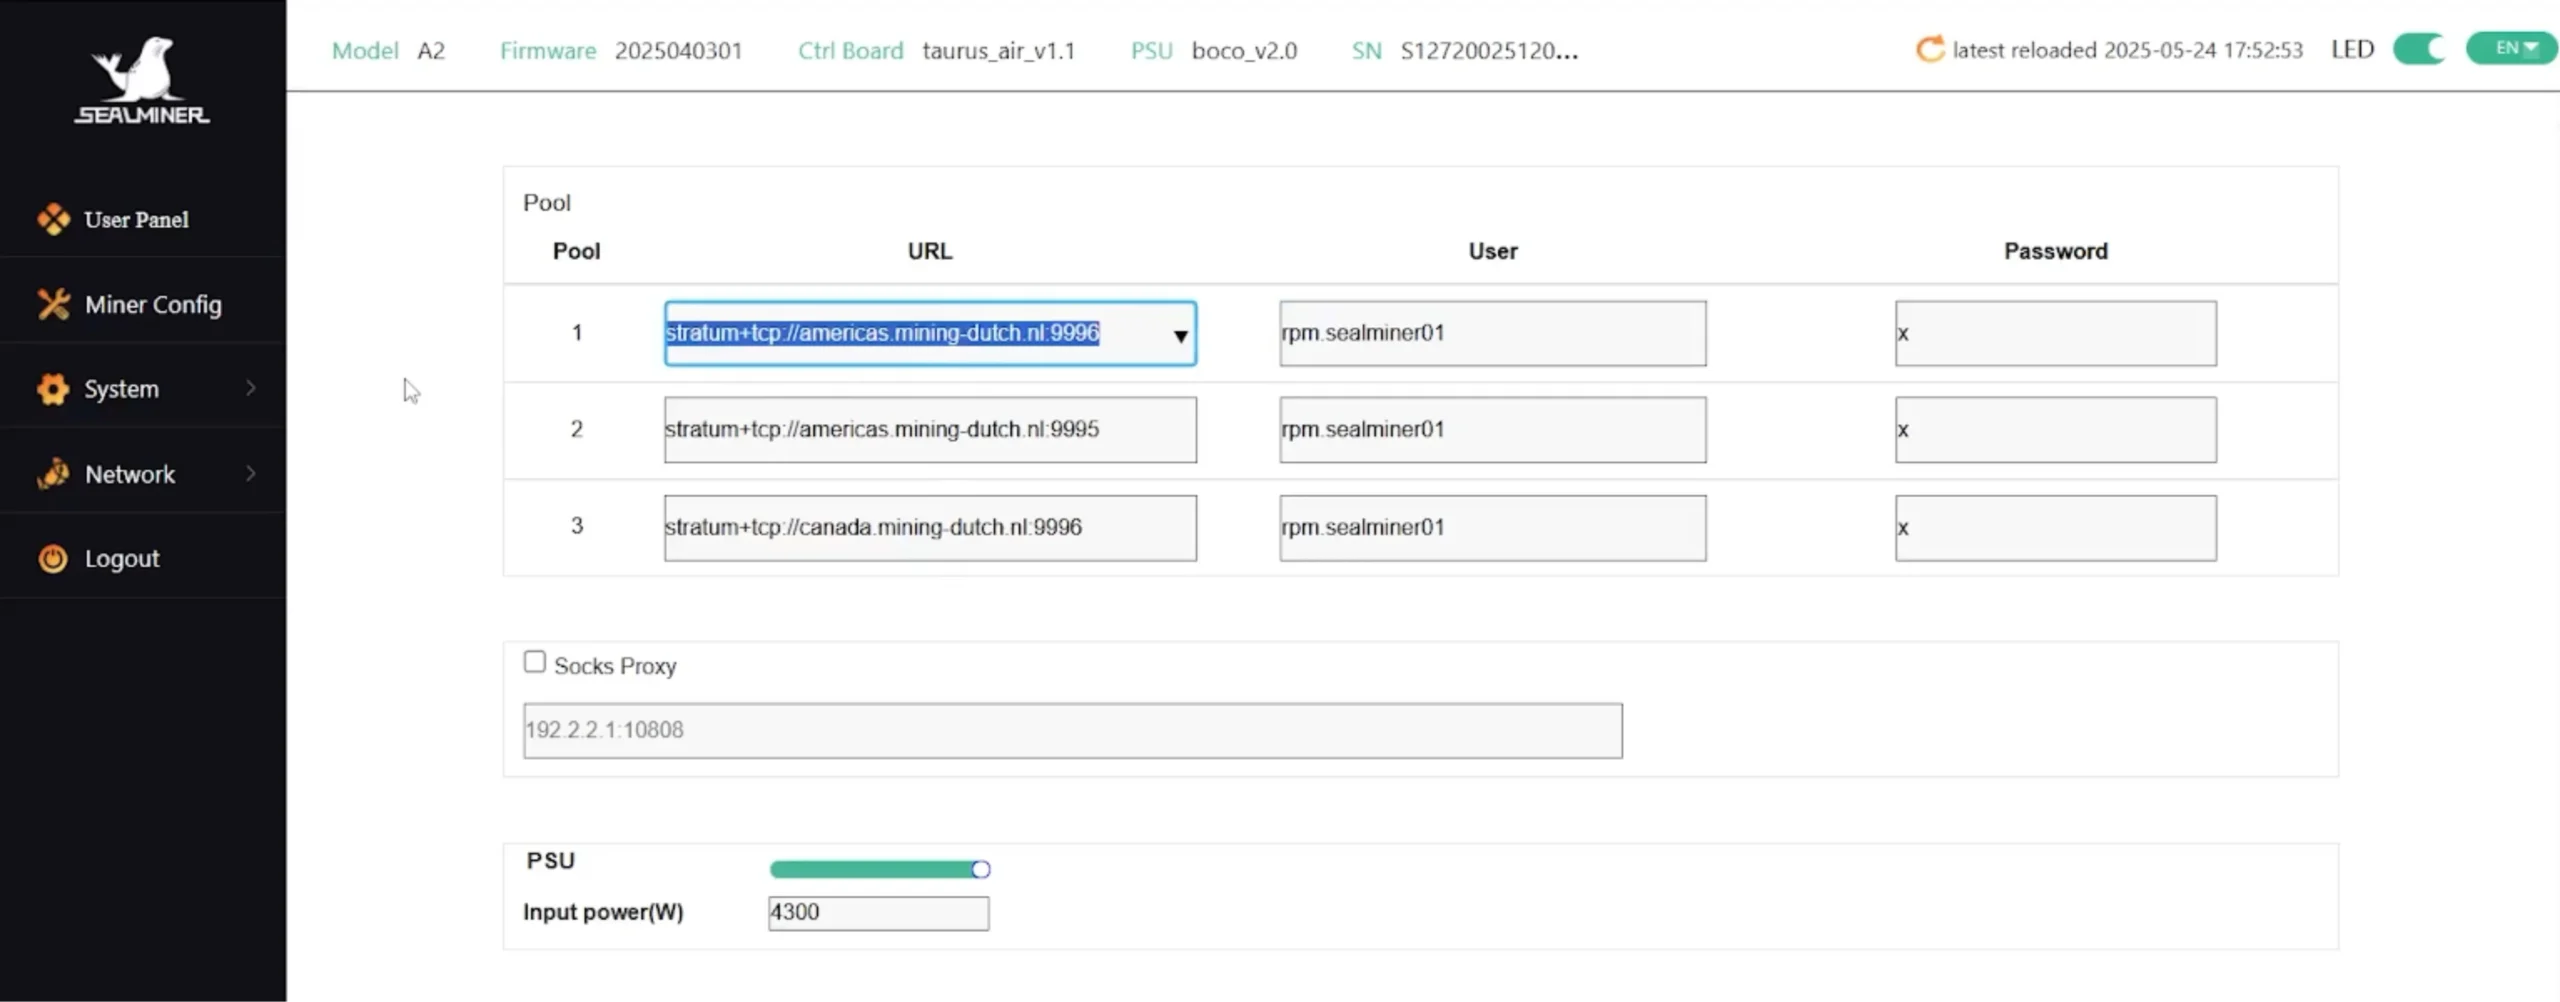
- For redundancy, add Pool 2 and Pool 3 with different server ports (e.g., 4014 or other region-specific backups).

- Now, input your Miner Name using the format:
YourUsername.WorkerName (e.g., RPM.SealMiner01).
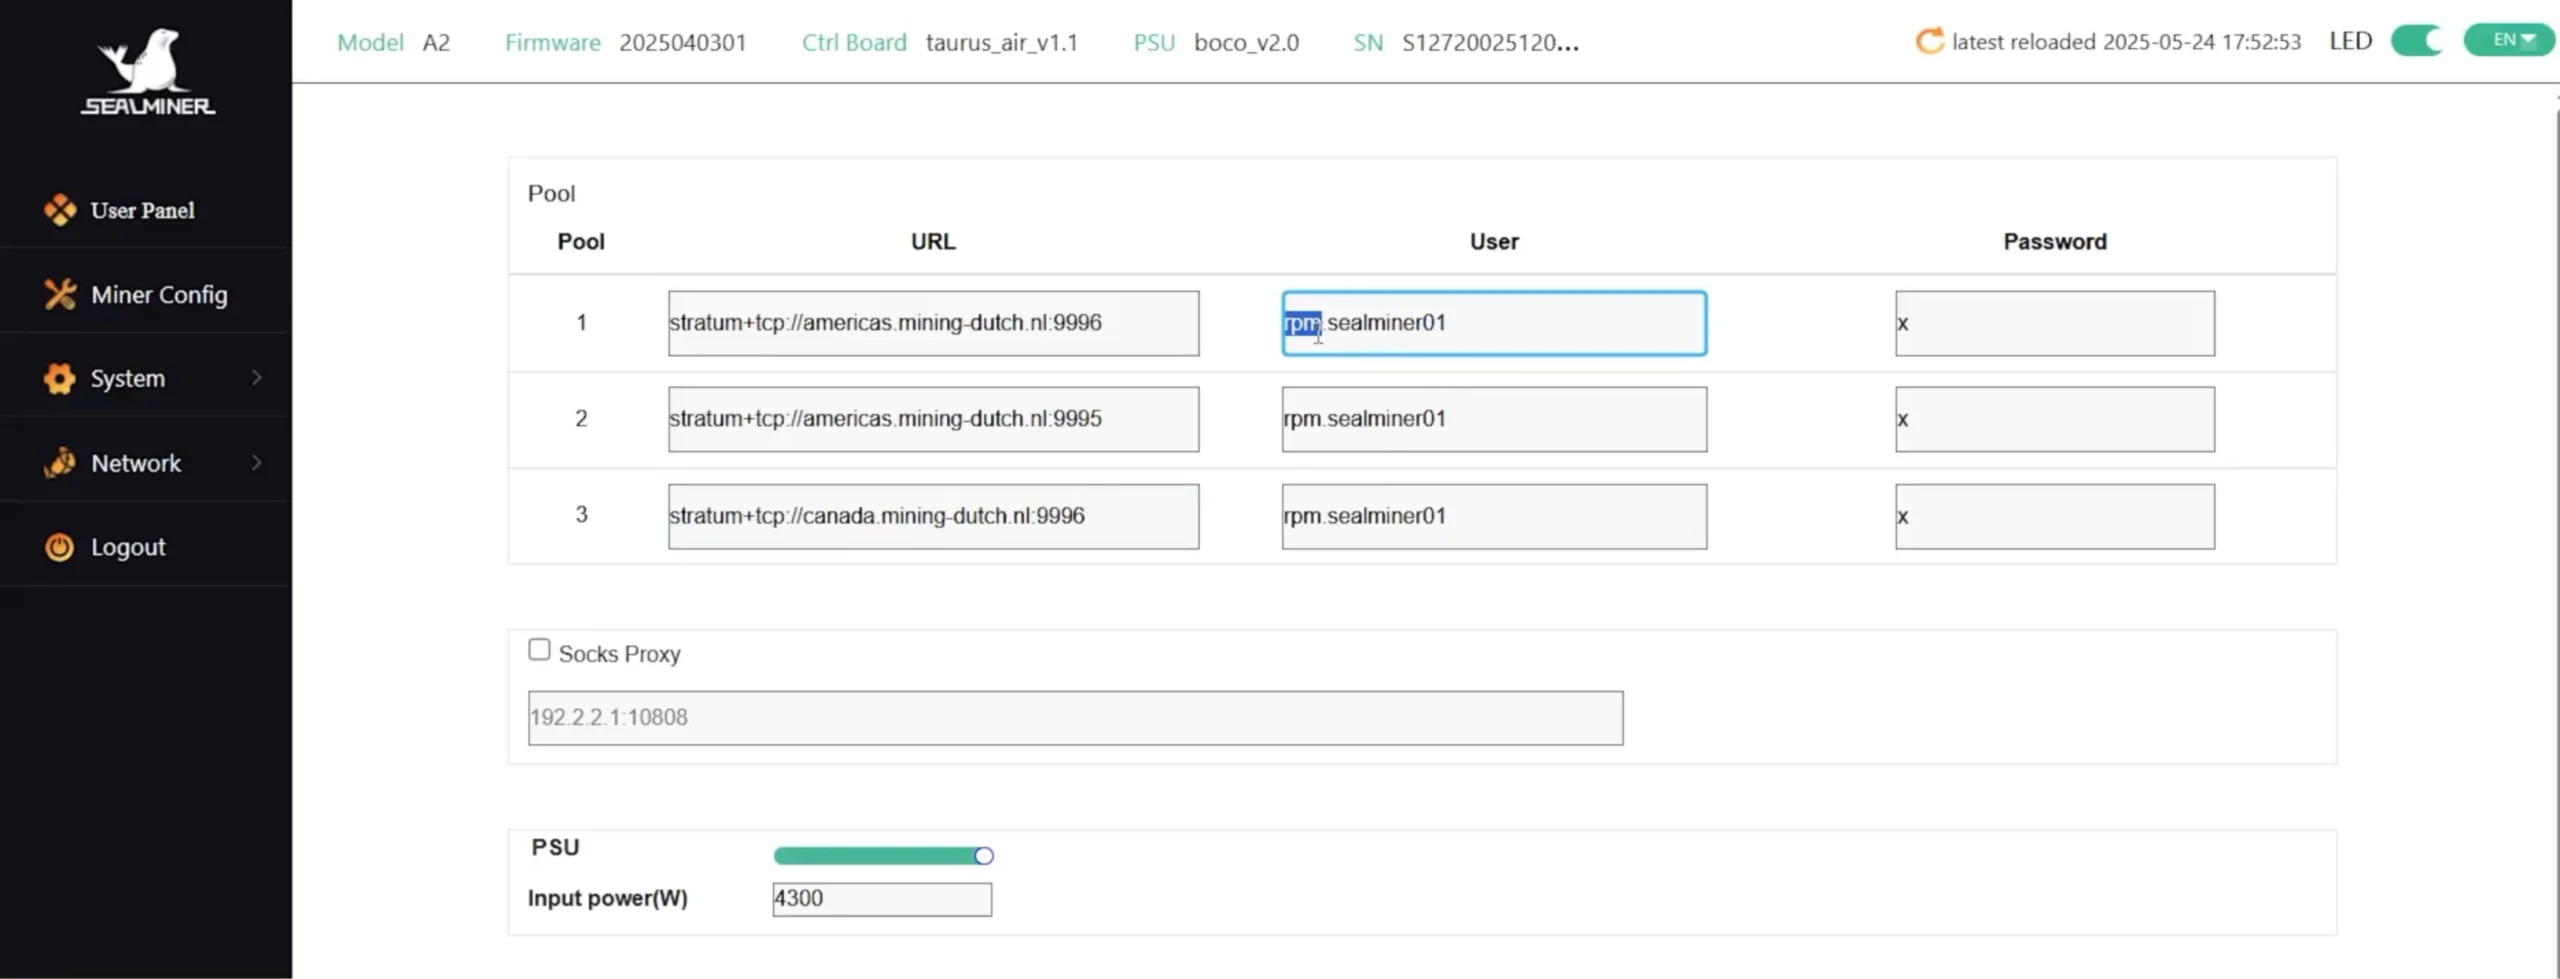
- Set the password field to “x” or any custom password.

- Choose your preferred Power Mode (Low, Normal, High Performance, or Custom). For efficiency and quieter performance, Low or Normal mode is recommended.
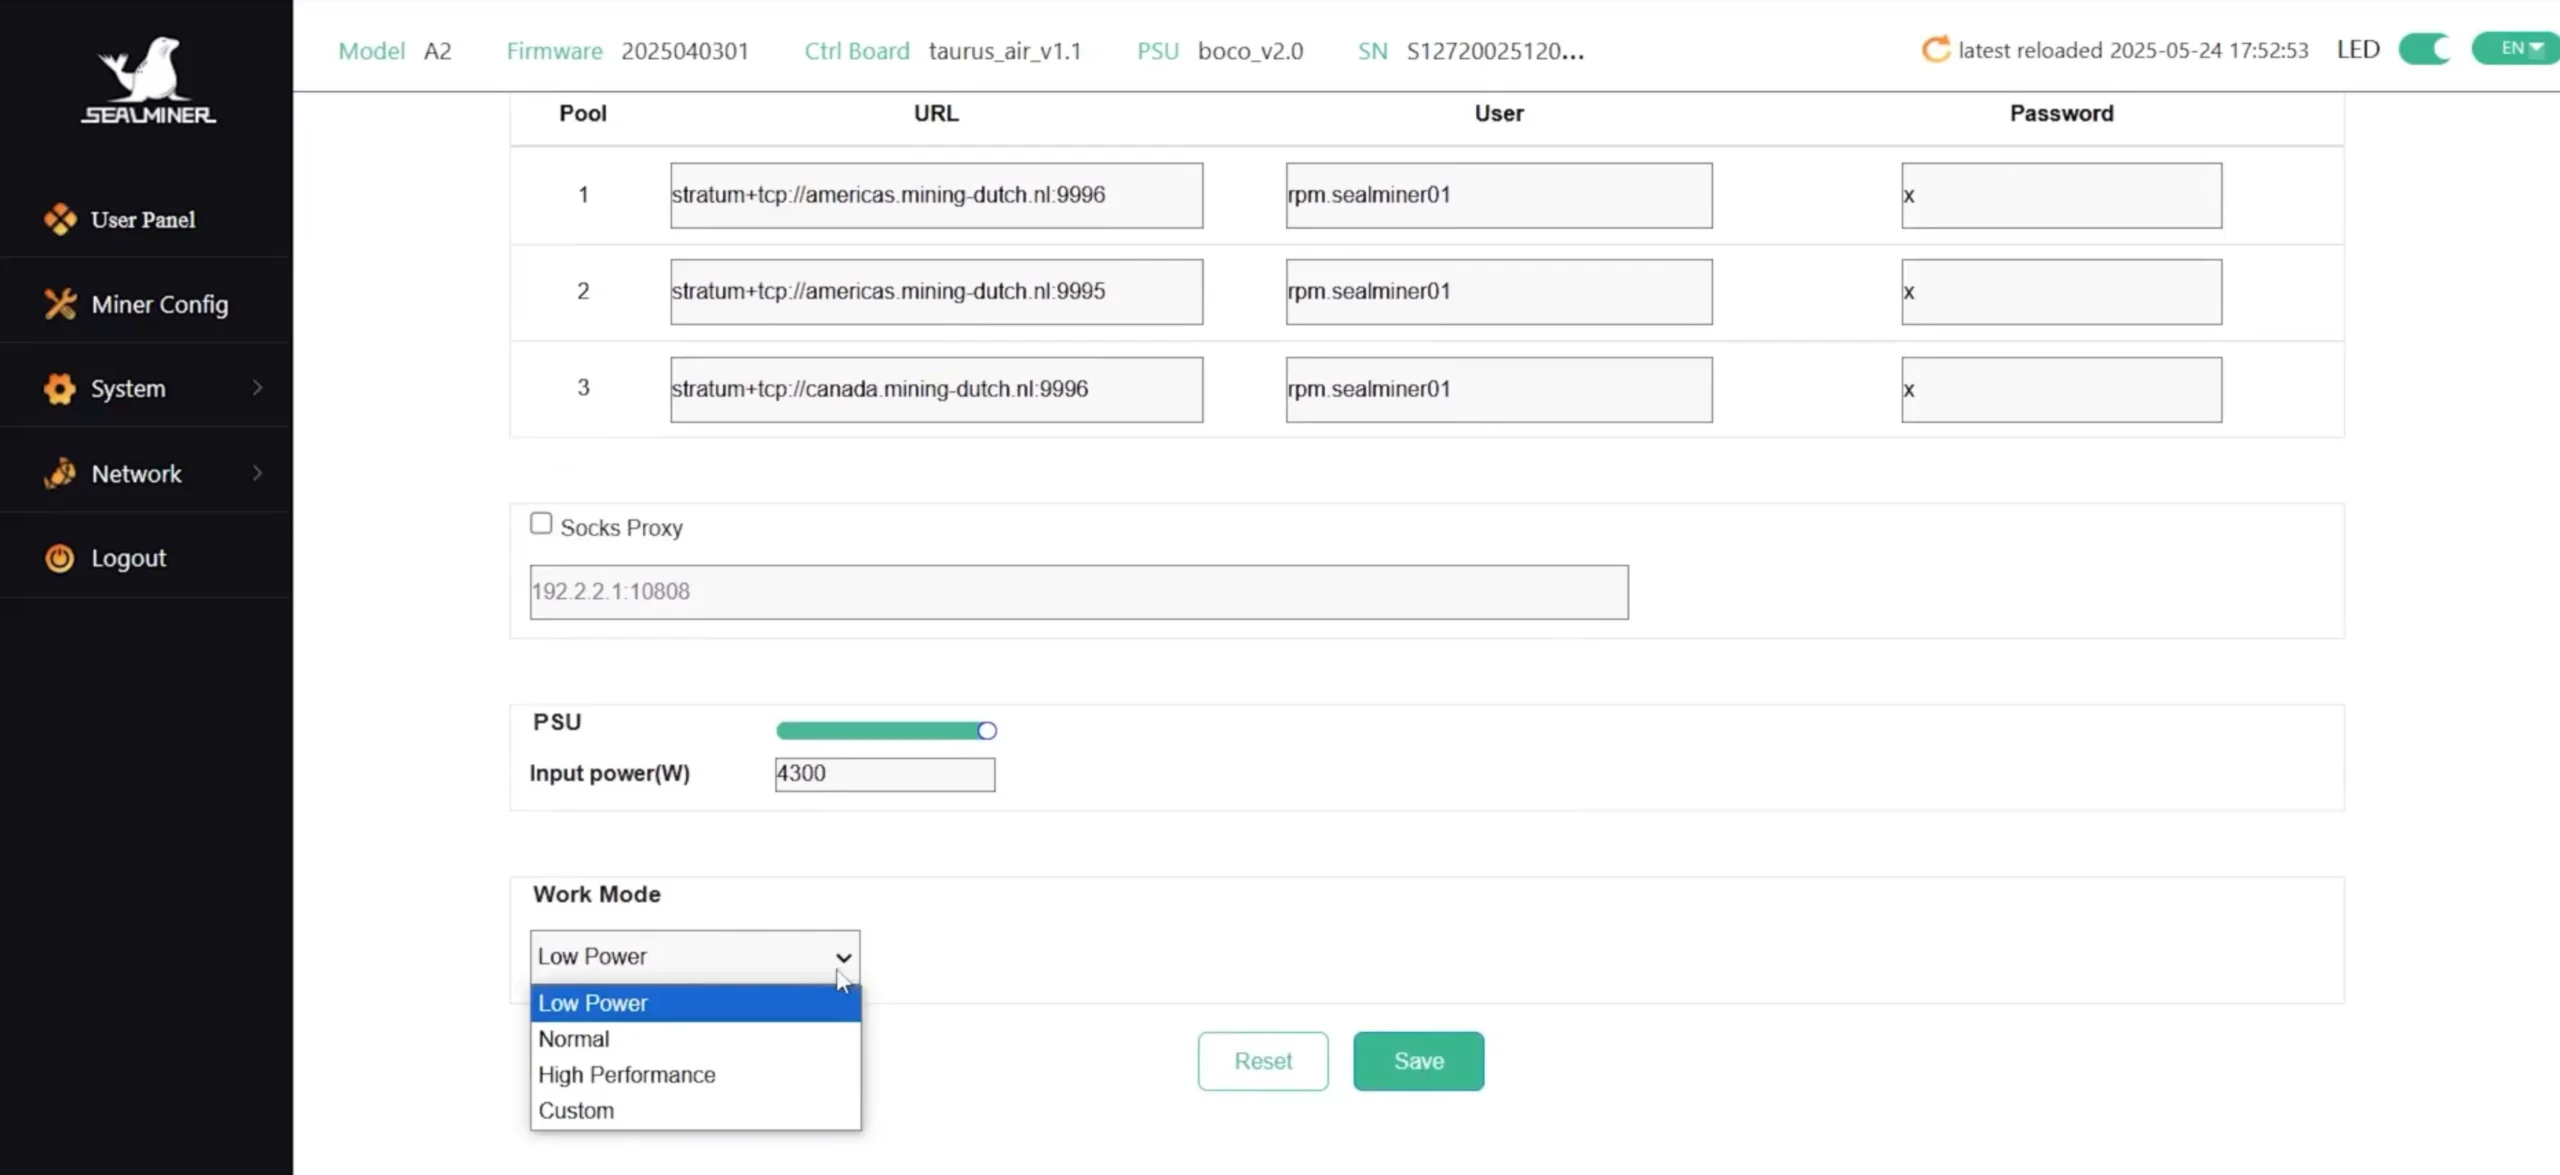
- Click Save to apply changes.

5. Start Mining
- After saving, the SealMiner A2 takes about 5 to 7 minutes to ramp up. It will then automatically start coarse tuning, followed by fine tuning which may take another 10–15 minutes.

- In total, expect 20–30 minutes before the miner reaches its optimal performance level.

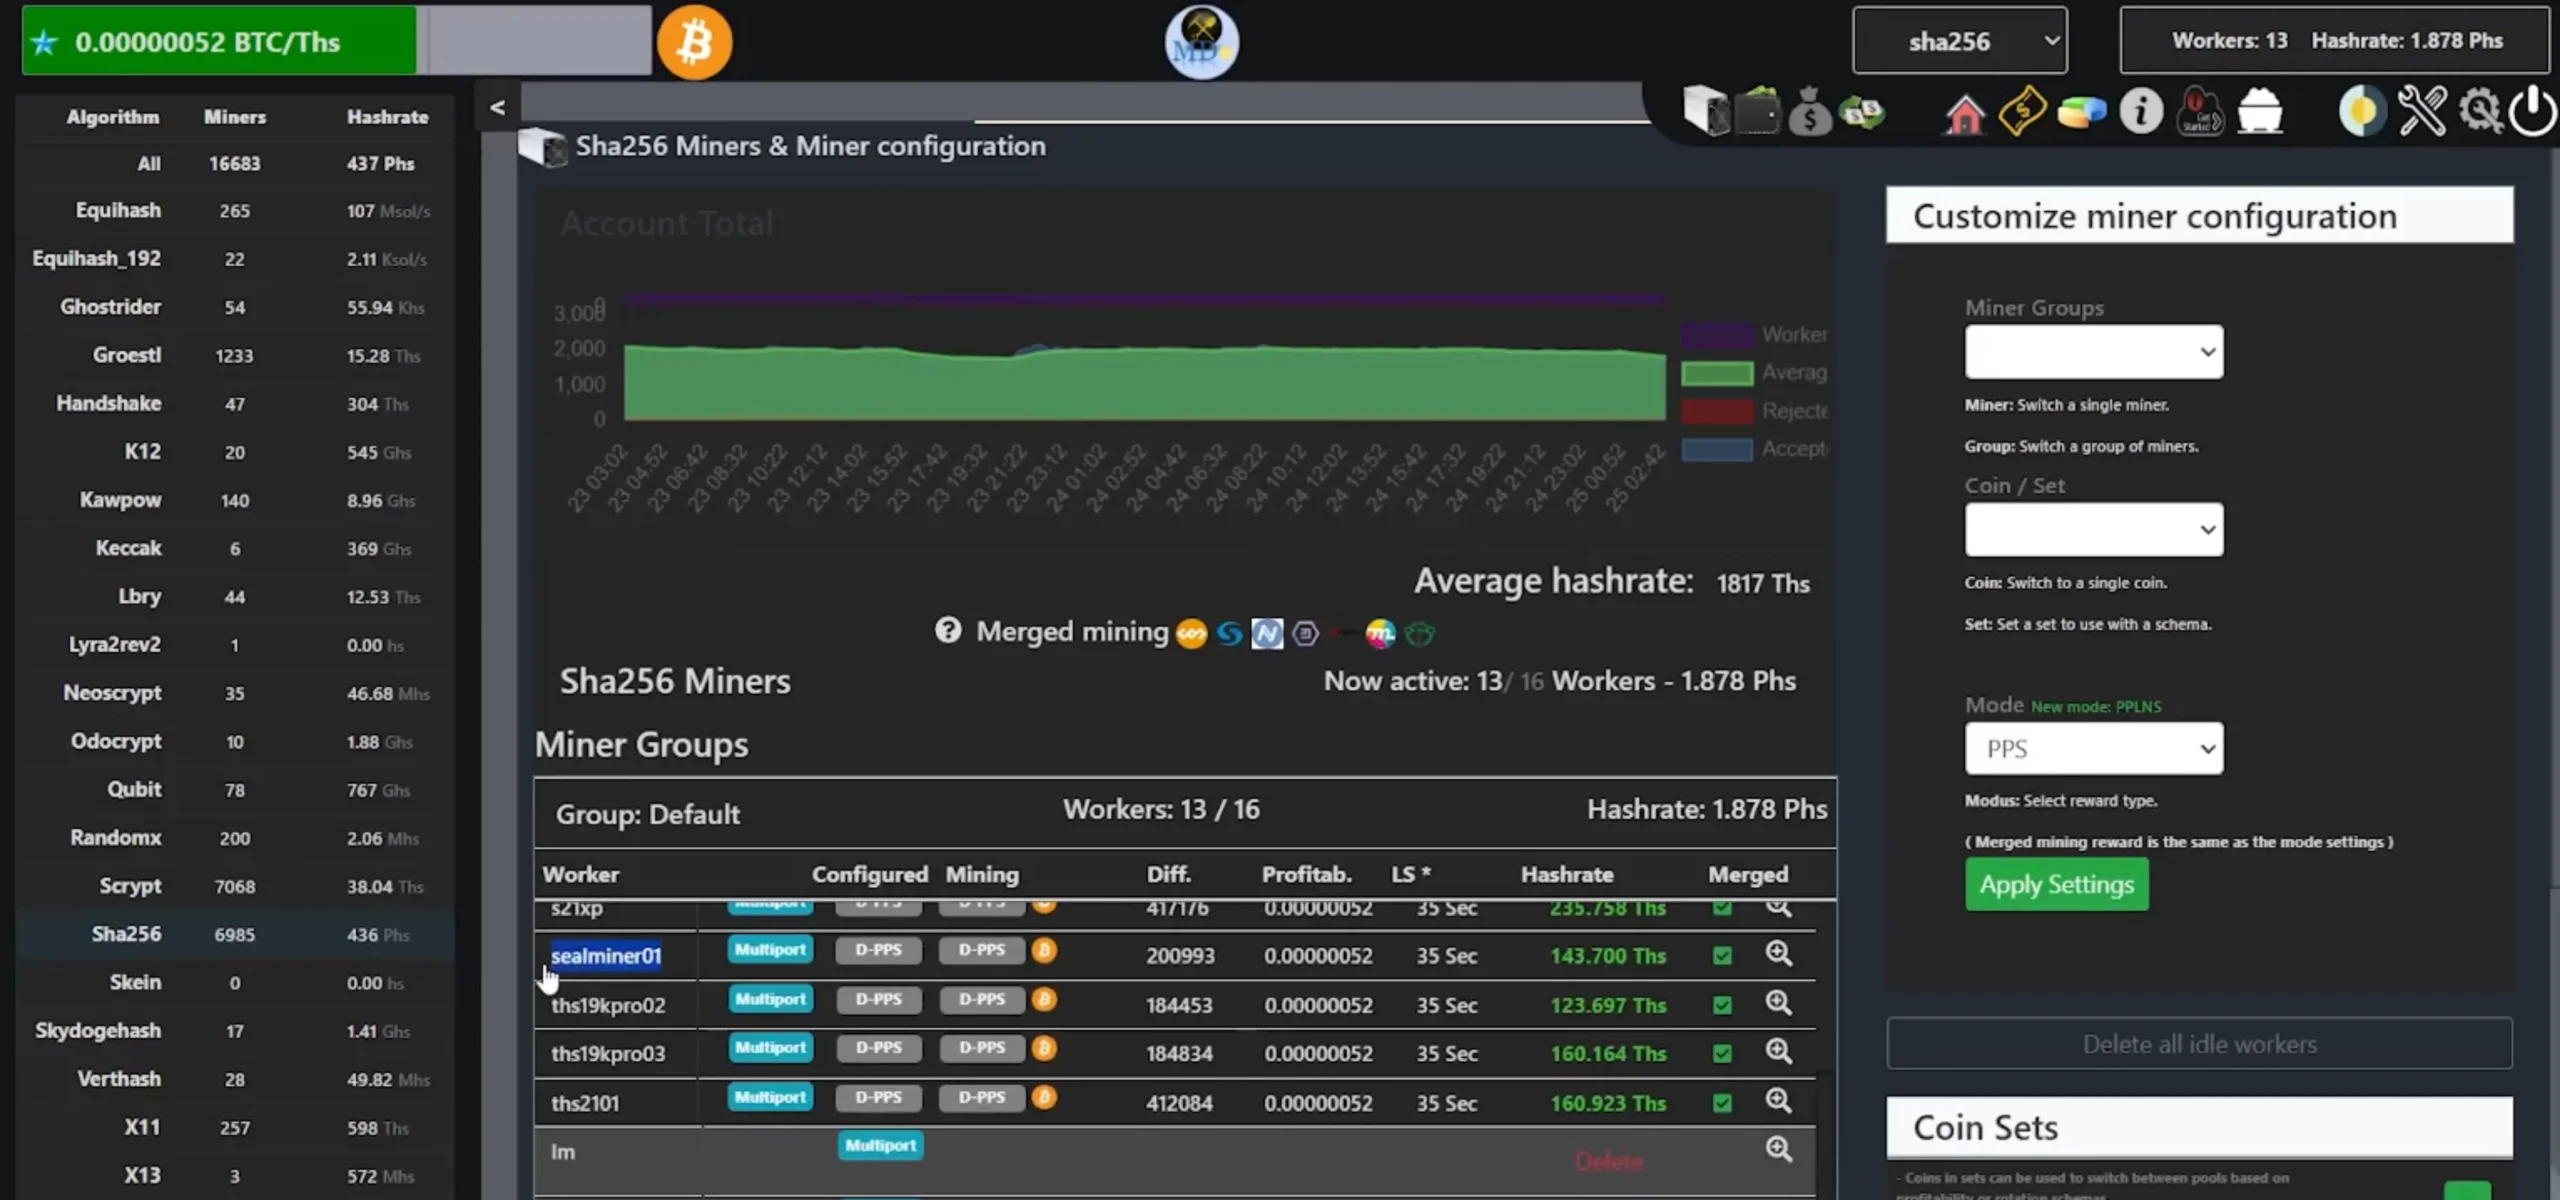
- Once the setup completes, visit the “Workers” tab on your mining pool dashboard to verify your miner is online and hashing.
- Navigate to the “Wallets” tab on Mining Dutch

- Click Payout Settings
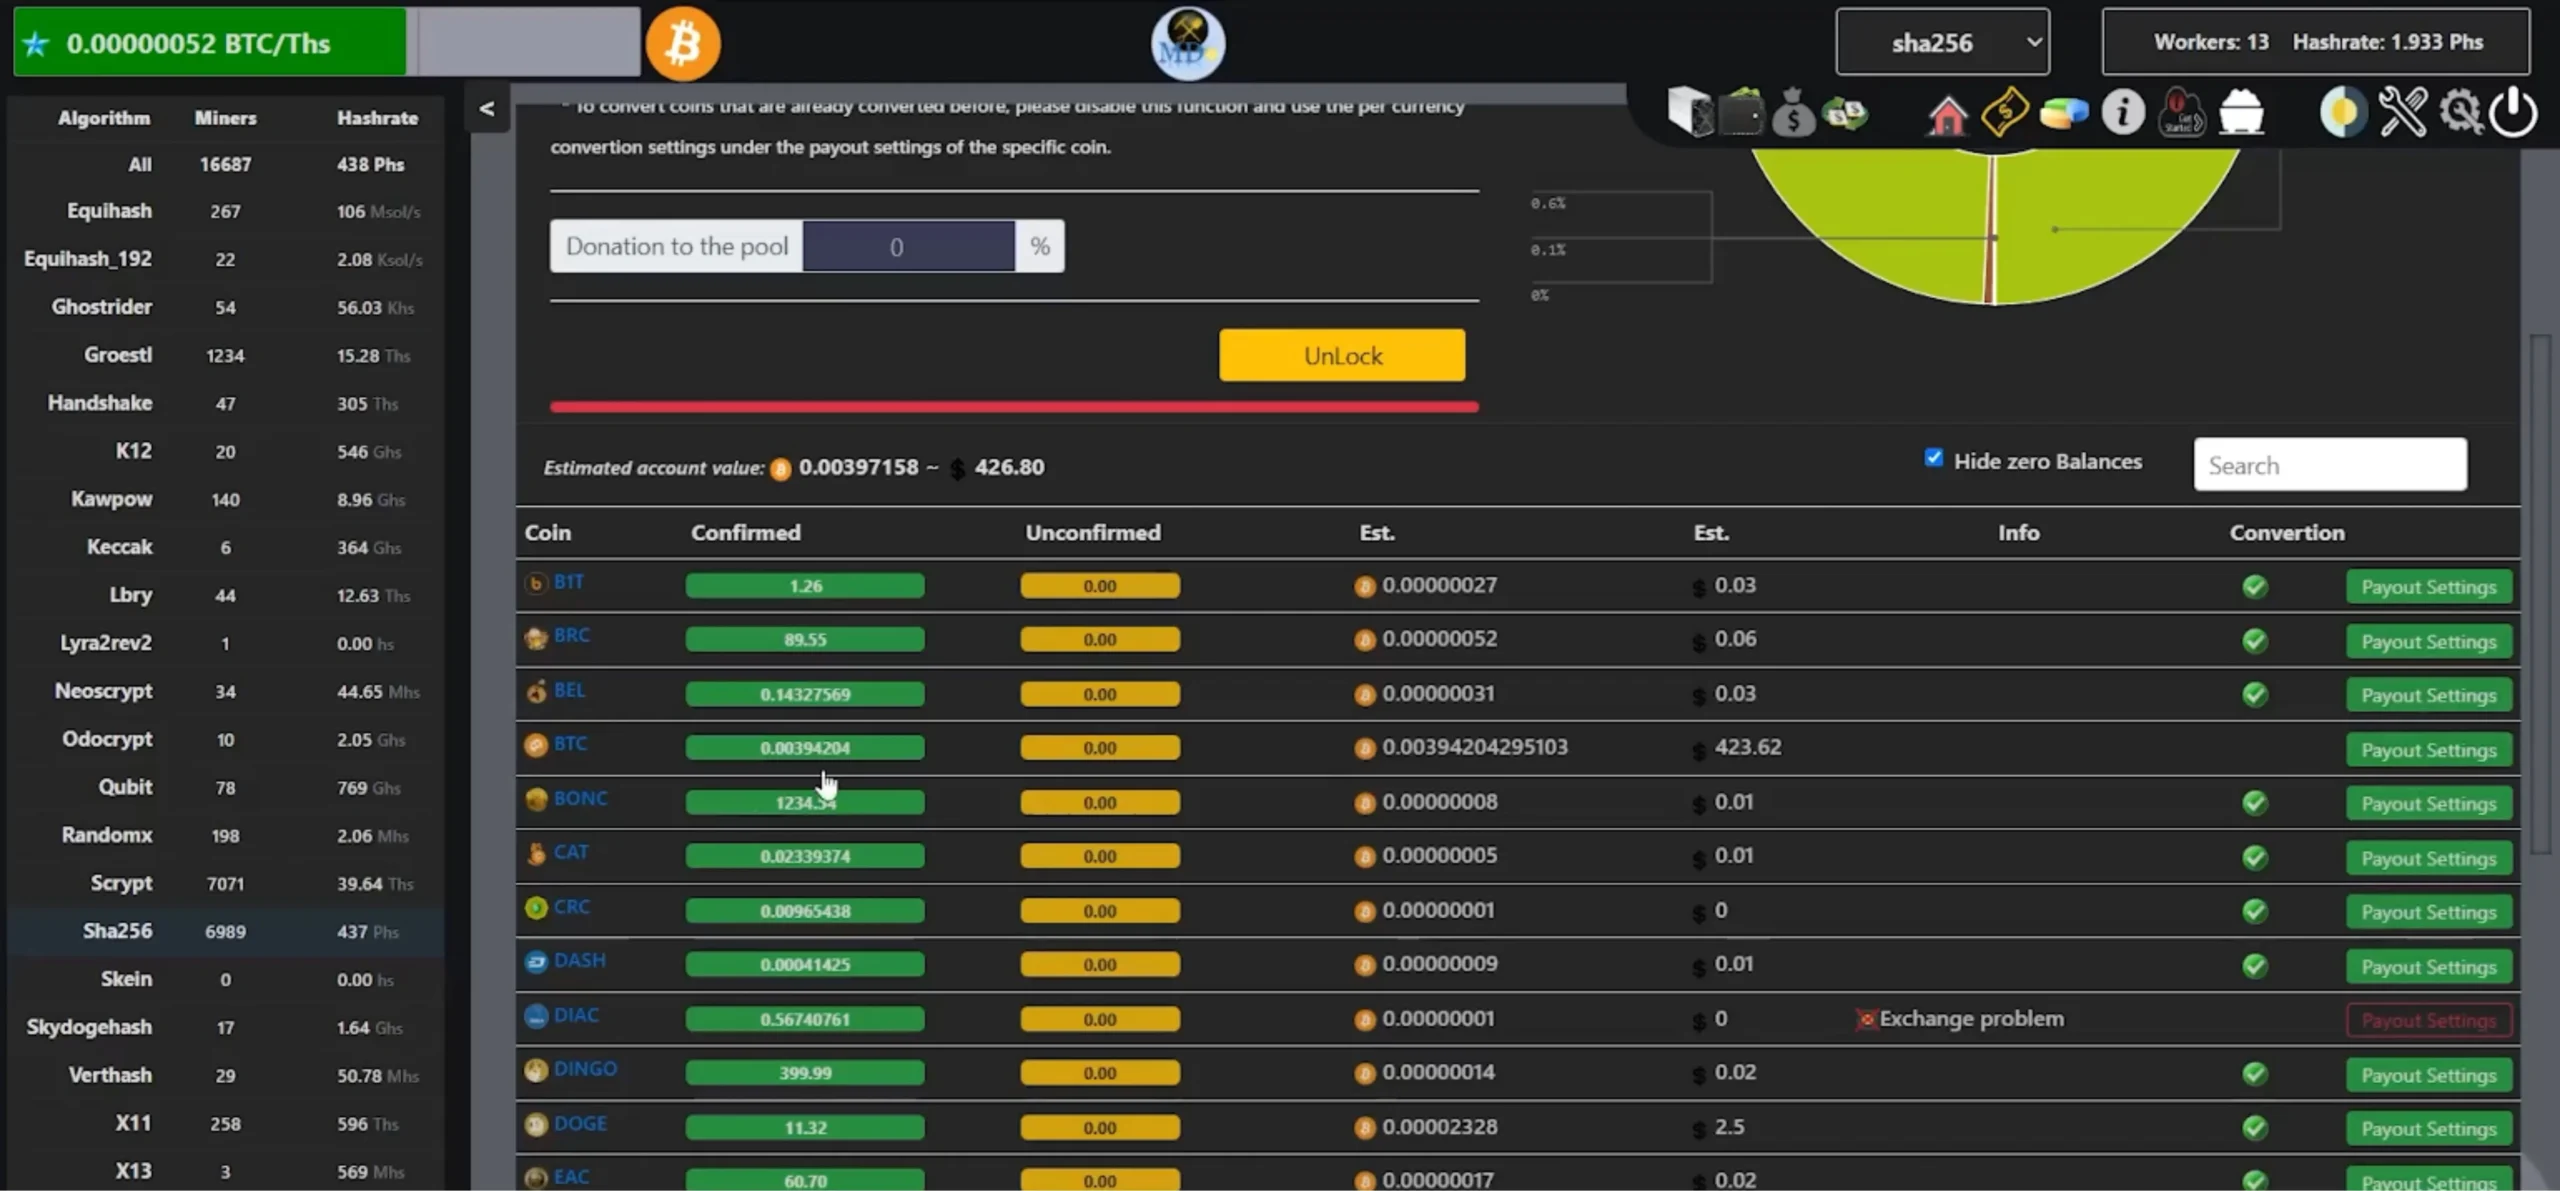
- Input your Bitcoin receiving address (ideally from a secure cold wallet like Tangem or Ledger)

- Set your payout threshold
- Once the threshold is met, your earned Bitcoin will be sent automatically to your wallet.
For the non-readers, we made a feature film!
Check out how to Setup Bitdeer SealMiner A2
CONCLUSION
The Bitdeer SealMiner A2 offers an impressive combination of performance, quiet operation, and sleek design. With proper ventilation, reliable power, and pool setup, it’s an excellent option for serious miners.
By following this detailed guide, you’ll have your SealMiner A2 up and mining efficiently in no time. For more tutorials or to purchase a unit, check out Crypto Miner Bros.
Check out the latest Bitcoin Miners
FAQs ON HOW TO SETUP BITDEER SEALMINER A2
-
What power setup is needed for the Bitdeer SealMiner A2?
You’ll need a dedicated 30A, 220V–240V circuit along with a compatible PDU. The miner consumes up to 3730W depending on the power mode.
-
Can I use Wi-Fi to connect the SealMiner A2?
No, the SealMiner A2 only supports Ethernet. A stable, wired internet connection is required for proper mining.
-
Is the SealMiner A2 loud during operation?
The initial startup is loud, but it quiets down during mining and averages around 34 decibels suitable for home setups with ventilation.
-
What if the primary mining pool server fails?
If you configure backup pool servers in the miner settings, the device will automatically switch to them if the main server goes offline.
-
How do I get paid in Bitcoin from the SealMiner A2?
Set up your payout wallet address in your mining pool’s payout settings. Once your earnings reach the threshold, payouts will be sent automatically.

Join our Newsletter
Get the week’s best cryptomining content in your inbox.

Han su
Han Su is a technical analyst at CryptoMinerBros, a leading provider of cryptocurrency mining hardware. He has over 5 years of experience in the cryptocurrency industry and is an expert in mining hardware, software, and profitability analysis.
Han is responsible for the technical analysis and research on ASIC Mining at Crypto Miner Bros. He also writes in-depth blogs on ASIC mining and cryptocurrency mining, and he has a deep understanding of the technology. His blogs are informative and engaging, and they have helped thousands of people learn about cryptocurrency mining.
He is always looking for new ways to educate people about cryptocurrency, and he is excited to see how the technology continues to develop in the years to come.
In spare time, Han enjoys hiking, camping, and spending time with his family. He is also an avid reader, and he loves to learn about new things.
Similar Blogs

Best Bitcoin Miners Under $500 for Beginners
Find the best Bitcoin miners under $500 for beginners. Compare hashrates, power use, noise levels, s...
Best Bitcoin Miners Under $1,000 for Beginners
Find the best Bitcoin miners under $1,000 with real specs, power usage, noise levels, and performanc...
Complete Beginner’s Guide to Initverse Coin (INIV)
What Is Initverse Coin? Initverse Coin is the main currency used inside the Initverse ecosystem. Peo...